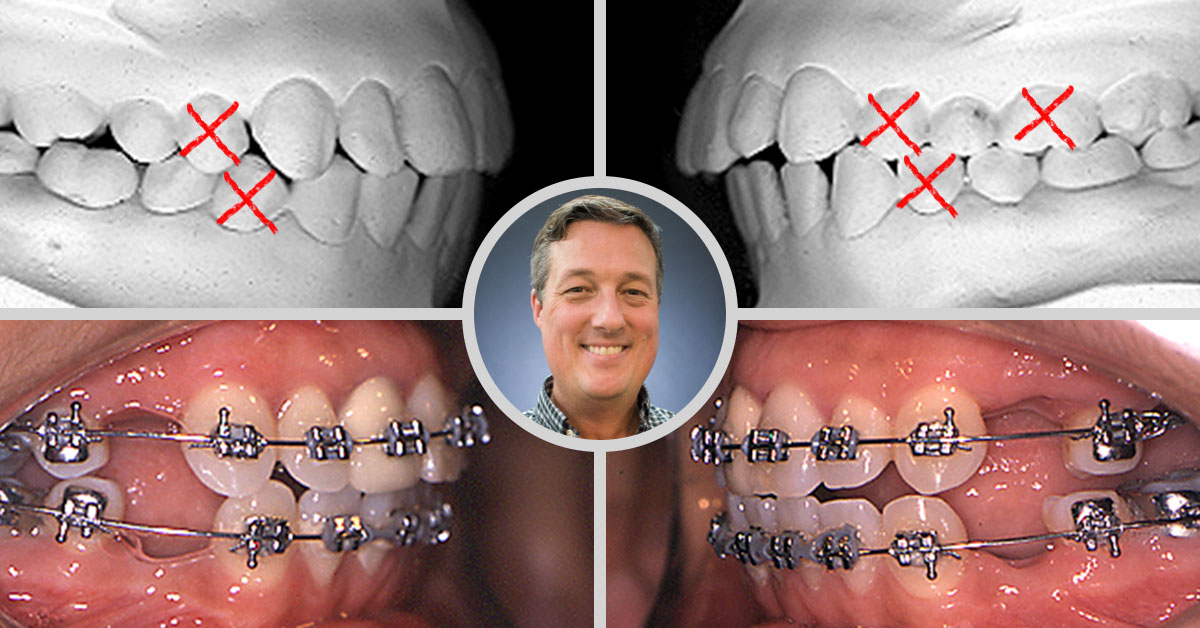
An orthodontic mechanics guru shares how to significantly decrease your treatment time and finish more cases Class I
As orthodontic providers, we all attempt to finish cases Class I, but occasionally we struggle to accomplish this goal. Many of us spend so much time trying to get into Class I that the inefficiencies decrease the profitability.
Oftentimes the solution to decreasing inefficiencies is to extract teeth, something anyone providing orthodontics needs to know if and when to do. This can be a frustrating challenge if you are unsure how to close the spaces efficiently.
Mechanics guru and tenured POS instructor, Dr. Shockley Wier, guides us to be more profitable and efficient in this article. With his tips, your extraction efficiency to attain Class I will improve in no time.
In a typical extraction case:
We all start with a round nitie, leaving it in place until the rotations are corrected.
We then place 18x25HA and enjoy a 6 month vacation. Of course during this “vacation” we cool the wire, tighten the ligatures, and take a pano and reposition brackets as needed.
To be more efficient: Get your cuspids into Class I early
Moving your cuspids into a Class I relationship quickly greatly increases the number of cases that you will finish Class I. It also greatly decreases treatment time, which saves you money and makes you look like a hero to your patients.
But how do we achieve this on our extraction cases? Follow these steps:
Step 1: Pack a coil on 18x25HA
With this step, you will attempt to get the cupids Class I on this wire, which will help to increase your efficiency.
Shock breaks it down:
- In Class II cases, I suggest that you tie in the upper 2s with stainless steel ligatures with pigtails mesial and upper 3s with pigtails distal. Pack nitie open coil (as much as you can) upper 2-3 to push the cuspids back to Class I.
- In Class III cases, you simply would do the same on the lower arch.
Step 2: Cinch back the wire
Cinching back your wire is the KEY to this procedure, otherwise the incisors will procline.
Shock breaks it down:
- In order to cinch the wire, flame the terminal end of the wire prior to inserting in the mouth, put the open coil on the wire, then once cool, place the wire.
- After the wire is tied in, place a small cinch back on the end of the wire, distal to the molar tube.
Step 3: Keep the coil activated
This will keep you on track to getting a cuspid Class I as early as possible.
Shock breaks it down:
- Reactivate the coil monthly with split hooks. By the time you are ready for 19x25ss, most cases will have (or will be very near) Class I cuspid.
Understanding mechanics in depth can help you be an efficient and profitable orthodontic provider. Sometimes little tips like these can save you hours of chair time and stress. I hope that this simple extraction tip will help you be more successful in orthodontics.
If you would like more details on this procedure, or would like to learn other procedures in mechanics, I encourage you to attend the Mechanics seminar written by Dr. Charlie Kahwagi and myself.