So you attended Seminar 1 and are ready to help patients and earn orthodontic income. We've broken down the process of starting cases into a few easy-to-follow steps to help you get started.
To maximize your orthodontic ability and resources, take these first steps with your staff and potential orthodontic patients before you attend Seminar 2. At this seminar, you'll learn how to analyze these records, create a customized, full treatment plan and instructors can support you live.
1. Promote your new service
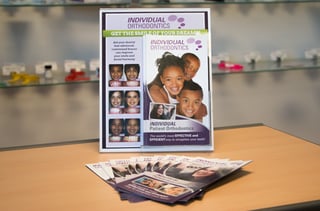
Let your patients know about the new service you are offering. Announce it on social media, add it to your answering/on-hold message, and place brochures around your office. Refer your patients to our website individualortho.com, which has lots of useful information for anyone considering ortho treatment. Don't forget to tell your team so they too can promote it! You or your manager can also watch a 30 minute webinar to help you to optimize your orthodontic demand.
2. Talk to patients

You most likely have patients already in your office who are great candidates for ortho, so start the conversation. Find out if they would like the opportunity to be one of your first cases. Often times patients are thrilled that they will not have to seek ortho treatment outside of your office! See 10 simple orthodontic case types that you can start working on now.
You can use this Individual Orthodontics Patient Treatment Guide flyer to help you explain the type of treatment your patient will need. Check out this thread on our forum to learn how some of our grads and instructors start cases in their practices. If you'd like more guidance on how to talk with patients (so they ask you for treatment), watch a 20 minute webinar on pre-clinical patient discussions.
Don't have a practice or patients to treat? Talk with staff, coworkers, family and friends. They are often great new orthodontic patients to start. So many people can benefit from orthodontics...so just ask!
3. Get record taking materials
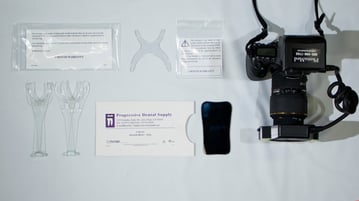
Adding orthodontics to your practice means that you'll need to add some new tools as well. For record taking, you will need retractors, mirrors, a camera, items to take impressions, and a way to get cephs. We conveniently offer many of the supplies you'll need at our store on SmileStream that are tested and proven for your orthodontic needs. But feel free to purchase elsewhere if you wish.
Here is a full list of record taking options and materials.
4. Take records
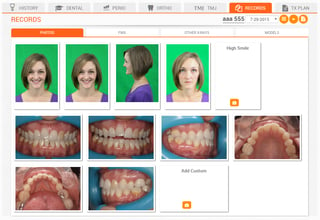
For full orthodontic records, you will need to take a pano, ceph, models (3 views), and photos (3 extra-oral, 5 intra-oral views). You can choose if you want them to be physical records or digital records (if the latter, you can skip the last step). As we discussed in a previous blog 6 Ways to Avoid Trouble with Your Ortho Cases, don't cut corners with your records!
Since taking a ceph/pano is different for each office, please call your local rep for guidance or seek out an imaging lab in your area. You can get trimmed, white stone models, order digital models at a lab like OrthoSelect, or use an intraoral scan.
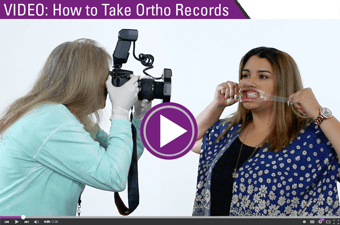
When taking the photos, it's important to take your time and get high quality images, so that you can accurately track the progress of your case as it moves along. For step by step instructions on taking excellent orthodontic photos, you and your staff should check out this short video. If you or your staff wants to get more hands-on training on taking records and other tasks, send them to get Assistant & Team Orthodontic Training.
5. Digitize orthodontic records
If you have physical records (printed photos, white stone models, or film pano and cephs), convert them into a digital file so you can later import them into your software. Put your digital files in a folder on your laptop or on a USB stick and bring it to class.
- Digitizing white stone models or photos - you can scan with most types of scanners (see tutorial) or take a digital photo with most types of cameras (including tablet or phone cameras). If you use a camera, have good lighting, take the photo from directly above and include a ruler or object of known measurement (like a penny) in the photo. If you're using an intraoral scan, make sure to export it as an .STL file. You should be able to do this with any/most brands of scanners.
- Digitizing photos - scan with any type of scanner
- Digitizing film panos and cephs - scan with a special scanner, like Epson V800 or use any type of camera to take a digital photo of your film on a light box. If you take a photo, include a rule or object of known measurement (like a penny) in the photo.
During the next few seminars you will continue learning how SmileStream software will help you to create customized treatment plans for your cases. If you come to Seminar 2 with cases digitalized, you will be able to import them into SmileStream and speak with an instructor about your case analysis. If you need more technical support, stay after class on the Friday of Seminar 2 for a special, complimentary computer support class.
