Having accurate orthodontic models are important in designing successful treatment plans. With new technologies, doctors can now minimize their clutter with digital 3-D orthodontic models. But, with electronic study models, can you still get the same accuracy as white poured stone models?
With these pro tips, you can get a high accuracy from your orthodontic lab.
Tip #1: Use the right materials
Use a 5-day alginate or PVS for your impression. This will eliminate or minimize distortion during shipping.
Make sure that you have used a tray size big enough to capture all teeth without missing molars or distortion from overhang. Your office should have at a minimum small, medium, and large impression trays to choose from. If you are not sure which size to choose, dry fit the tray into the patient’s mouth and visually inspect the fit.
Tip #2: Send a good impression
Make sure that you visually inspect the impressions for defects and retake them if necessary before shipping. It should have enough material to properly capture all teeth and soft tissue. Teeth appear correctly without distortion, holes, tears, or bubbles. See examples:
√ Good: 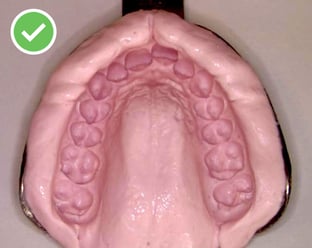
Bad: Missing anatomy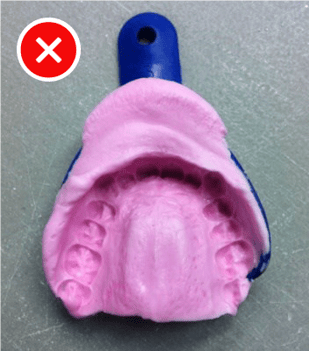
Solution: Use a proper sized tray
Bad: Missing anatomy
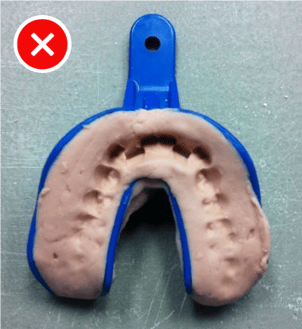
Solution: Use enough material
Bad: Material pulled away from tray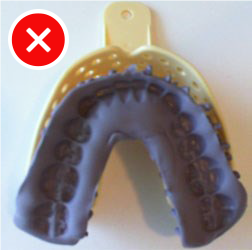
Solution: Use appropriate tray adhesive with proper drying time, a stiffer, better fitting tray or insert moist cotton rolls to keep impression in place
Bad: Unbalanced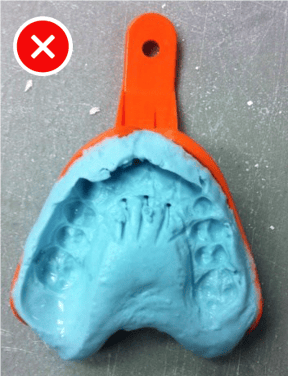
Solution: Apply even pressure when taking the impression
Bad: Double bite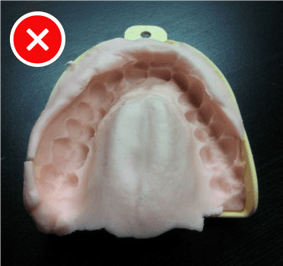
Solution: Retake impression
Tip #3: Provide a good bite register and intra-oral photos (or at least one)
Bite registers and intra-oral photos can dramatically help your lab recreate and align your patients’ bites properly. While both are helpful, the bite register is the more critical of the two. If you cannot provide both a bite register and intra-oral photos, you should at least provide one. This is the best way for technicians to properly set the arches in occlusion.
Get a good quality wax bite register by having your patient bite down using their normal resting or chewing bite (without shifting their jaw). Make sure to inspect your wax bite to ensure there is enough detail that is easily seen and that it is not crushed or dried out. On tricky bites, you should include patient photos. View recommended waxes.
√ Good: 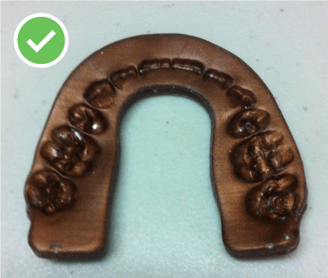
Bad: Lacking detail
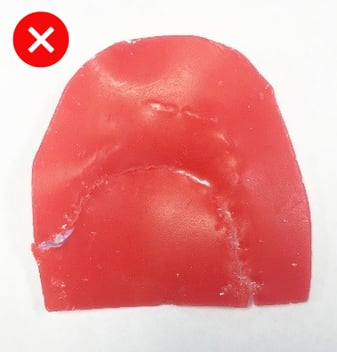
Solution: Retake the bite registration. Ensure proper fit and have patient bite down with sufficient force.
Bad: Crushed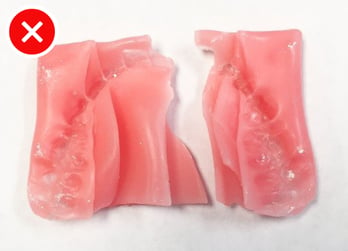
Solution: Retake the bite registration
Tip #4: Pack your impressions like a pro
Don’t be a slob. Make sure that your lab gets your impression in good condition and undistorted.
Wrap your impression and pack it with bubble wrap, foam peanuts or tissue so it fits well. The impression and bite wing should have minimal movement (but not be crushed) within the package.
Send your impression ASAP so nothing dries out. Wrap impressions in a sealed plastic bag with a moist paper towel. In the Winter, add a capful of rubbing alcohol to the paper towel to prevent freezing.
Too much to remember? Professional orthodontic labs like OrthoSelect provide all the necessary shipping materials, including sturdy shipping boxes so that impressions will arrive at in good condition.
Having great orthodontic records is key to having predictable treatment planning and being successful in orthodontics. With accurate digital models, you can be confident on your model measurement analysis which can be a key component of designing effective treatment. We hope that your team uses these four fool-proof tips to make your digital models ready for success.

